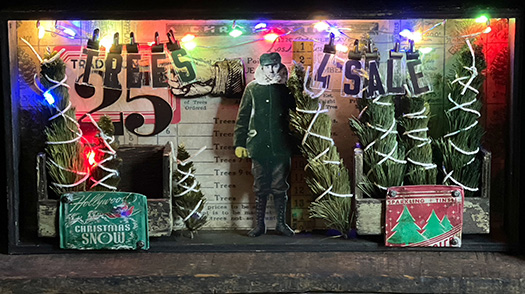
trees 4 sale
Yield: 1- Large Vignette
Box
Wet Ingredients:
Ink – Alcohol Mushroom; Distress Brushed
Corduroy, Walnut Stain
Other – Collage Medium (matte); Crackle
Paste; Embossing Pen
Crayon – Distress Walnut Stain
Embossing Glaze – Distress Fossilized
Amber, Peeled Paint, Rustic Wilderness, Tattered Rose, Walnut Stain
Paint – Distress Ground Espresso,
Picket Fence
Spray Stain – Distress Fossilized
Amber, Peeled Paint, Rustic Wilderness
Mica Spray Stain – Distress Holly Branch
Dry Ingredients:
Foundations – Vignette Boxes,
Vignette Trays
Paper – Backdrops (Christmas), Baseboards
(Christmas), Ephemera (Christmas), Layers (Christmas), Paper Dolls (Christmas)
Hardware – Hardware Heads, Ruler Pieces, Tin Tops,
Tiny Clips, Vignette Hardware
Other – Mini Marquee, Remnant Rubs (Christmas),
Tiny Lights (Christmas), Woodland Trees, Woodland Tree Lot
Ribbons – Cotton String
Tools/Equipment:
Other – Cling Film, Hammer, Heat Tool,
Palette Knife, Rubber Bands, Splat Box, Steel Wool, Tin Snips
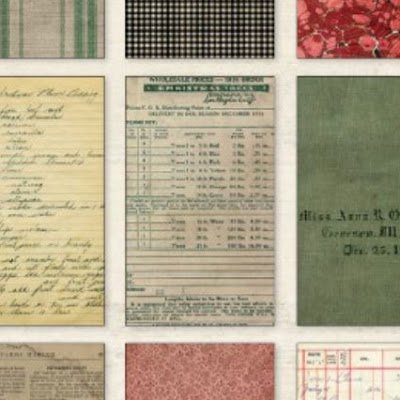
The inspiration for this project all started with a piece of paper–one of the new Christmas Backdrops. With so many fabulous pieces in this year’s Ideology Christmas release, every package I opened seemed to have the perfect ‘something’ to keep telling this story.
It takes two of the smallest vignette boxes to make the tree bins. I (carefully) broke one of the long edges of the box
and reattached it with collage medium across the box opening.
The boxes were all crusted with crackle paste; once dry and cracked I rubbed the vignette boxes and tray with steel wool
to pull off chunks and pieces to make them look more worn and brushed with a very diluted coat of Ground Espresso Paint
(when diluted the green tones that make up this colour
really come out).
The Backdrops, Ephemera and Layers were all glued down with collage medium. Remnant Rubs were added,
and the Baseboard pointy finger (my favourite!) everything got coated with collage medium and grunged up
with some Distress Walnut Stain Crayon.
The corners of the Tin Tops were cut using tin snips and the edges folded back, hammered flat and finished with
Hardware Heads and some Mushroom Alcohol Ink.
The paper doll was coloured using Distress Embossing glazes. I rubbed a little steel wool over it to dull some of the shine.
I absolutely love the yellow (Fossilized Amber) work gloves turned out (nostalgic moments) and the Ruler Piece
was made a distressed yellow to match (I miss these rulers in the ideology line).
The screw eyes from the vignette hardware were randomly placed in the top of the vignette tray and the coloured tiny lights
loosely strung through the eyes and pulled down to create swags. I wanted it to look thrown together so even the extra
tail of lights didn’t get trimmed to fit. The Mini Marquee letters were brushed with a little Picket Fence and hung from the
Tiny Lights with Mini Clips (HUGE THANK YOU to Tim for the last-minute adjustments on the tree lot sign
–I know how hard it was to get my fingers in the light stand with the letters and the mini clips)
 |
| photo credit Tim Holtz |
This post contains affiliate links below. If you click on one of them and make a purchase I receive a commission (there is no cost to you).


No comments:
Post a Comment